Heat Staking Inserts: Design & Process Guide
By Alex Spurgeon — 2026-05-27
Heat staking inserts are the answer to a problem every design engineer eventually meets: you need a real, reusable thread in a plastic part, and the self-tapping screw is either stripping out on the second service call or splitting the boss on the first. The fix is older than most of the engineers asking about it — soften the plastic, press a knurled brass (or stainless) insert into it, let it cool, done. Now you've got a metal thread that holds machine-screw torque in a plastic housing.
I've been installing inserts in customer parts since 2009, and the questions I get are almost always the same five. So instead of writing another vendor brochure, here's the version I'd give you over coffee — process, design rules, the materials that fight you, and (importantly) when you should just use a screw and walk away.
> Looking for the equipment or a supplier rather than design rules? See our brass insert installation page for the presses, tooling, and application support we build in Roanoke, Indiana.
The short version, up front
If you don't read the rest, read this:
• **A heat staked insert is a knurled metal bushing pressed into a moulded hole that's been softened by a heated tip.** As the plastic cools, it flows into the knurls and the insert is locked in — rotationally and axially.
• **The hole is moulded slightly undersize.** Interference is what gives the molten plastic somewhere to flow.
• **Brass is the default**, stainless or aluminium are valid for corrosion, weight, or RoHS reasons.
• **It only works on thermoplastics.** Phenolics, BMC, anything thermoset — you mould the insert in or you cold-press it. You don't heat stake it.
• **The result holds machine-screw torque and survives dozens of in-and-out cycles.** A self-tapper in raw plastic doesn't.
That's it. The rest is detail.
How heat staking an insert actually works
The process is four moves, in this order, every time:
1. Mould a hole slightly smaller than the insert OD. Usually the insert manufacturer publishes the recommended hole diameter — follow it. The hole gives the molten plastic somewhere to go. 2. Heat the tip. The thermal tip is held at a temperature tuned to the resin — about 20 °C above its melt point for semicrystallines, a wider window for amorphous resins like ABS and polycarbonate. The tip transfers heat through the insert into the plastic interface, not into the plastic directly. 3. Press the insert in under controlled force. As the plastic softens, the insert slides home. Knurls, barbs, undercuts on the insert OD fill with molten plastic. On our presses the Weld by Energy control system stops the cycle when the right amount of energy has been delivered, instead of running on a stopwatch — so a small variation in part temperature or material batch doesn't change the result. 4. Cool under load. The tip retracts, the plastic re-solidifies around the knurls, and the insert is locked.
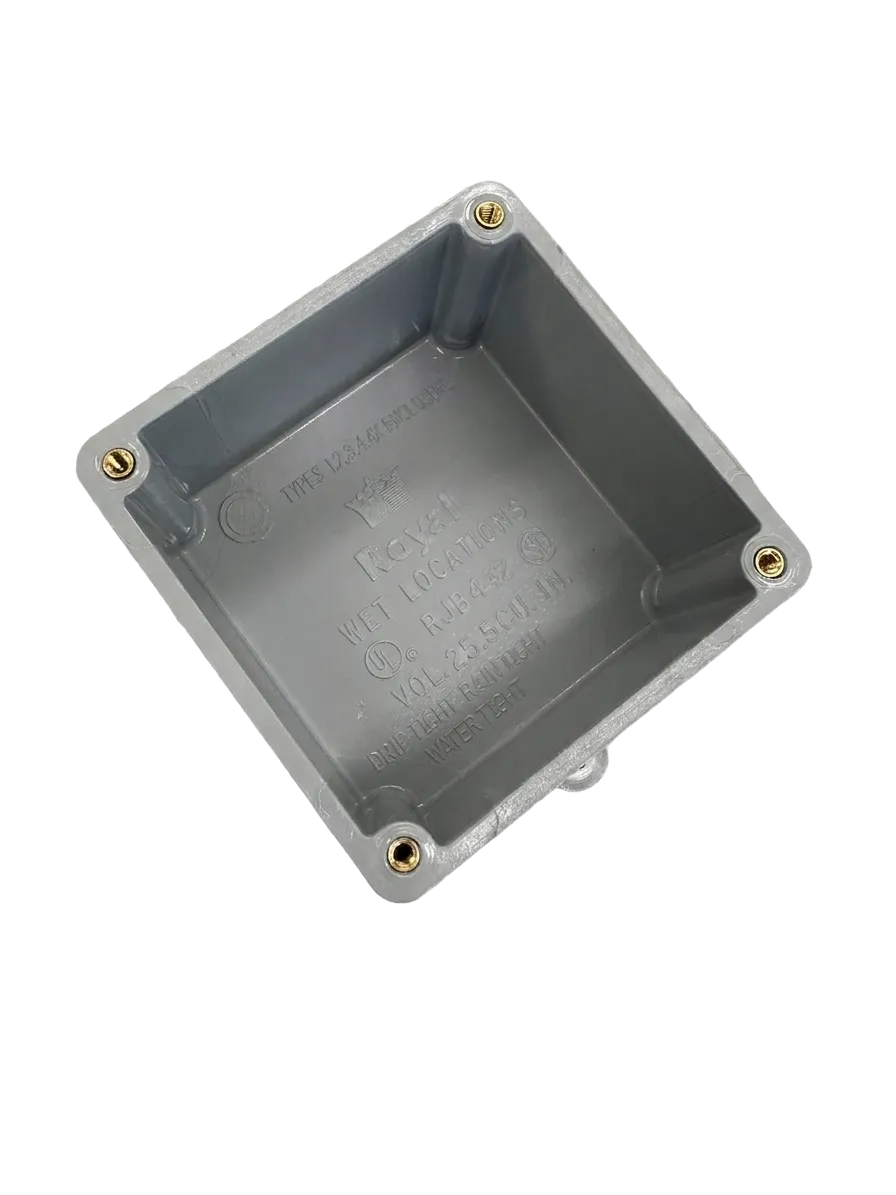
The whole cycle is a few seconds. The actual heating phase is sub-second on most parts — most of the time is the controlled cool-down. Cool too fast and you trap stress. Pull the tip away with the head still soft and the insert can lift.
Insert types and the knurls that hold them in
Walk into any catalogue (PennEngineering, SPIROL, E-Z LOK, take your pick) and you'll see roughly the same family tree. Don't let the part numbers scare you:
• **Tapered inserts** — the OD steps down. Self-aligning, fast to install, slightly lower pullout than a straight wall of the same length. Good general-purpose pick.
• **Straight-wall inserts** — uniform OD with a lead-in chamfer. More surface area engaged in the plastic = more pullout strength.
• **Symmetrical** — knurled both ends, no orientation needed. The operator-proof option for assembly lines.
• **Flanged** — a flange on top for very high pullout in reverse-entry applications, or where the assembly load tries to push the insert *back out*.
• **Micro** — threads as small as M1 / #0-80 for medical and electronics.
Almost every modern insert uses opposing knurls — a right-hand knurl on one half of the OD and a left-hand knurl on the other. The right-hand knurl resists clockwise rotation, the left-hand one resists counter-clockwise, and the knurl ridges themselves resist axial pull-out. Add a barb or an undercut and you've also got a positive mechanical lock against pull-out.
Rule of thumb: vertical (axial) grooves = torque retention. Horizontal grooves and barbs = pull-out retention. Knurled both ways = both. If you're spec'ing for high torque, look at the knurl pattern, not the price.
Brass vs stainless vs aluminium
Brass is the default for one reason: it conducts heat well and machines cleanly, so the tip can deliver energy through it without overheating the body. It's also non-magnetic, naturally corrosion-resistant in normal use, and cheap by the bag.
| Material | Use when | |---|---| | Brass (C36000-ish) | Default. 90% of jobs. Indoor, dry, normal load. | | Stainless (303 / 304) | Outdoor, marine, medical sterilisation, food contact, RoHS-driven jobs. Takes a bit more cycle time because it conducts heat slightly worse than brass. | | Aluminium | Weight-sensitive (aerospace, drone, portable). About 70% lighter than brass. Lower torque rating — match the application. |
The one I see new customers get wrong: speccing stainless because "it's stronger" on a part that lives in a dry electronics enclosure. The part doesn't need it, you've paid 3× the unit cost, and brass would've done the job for decades.
Which plastics actually take an insert well
The first question on every quote: "what's the resin?" Because that's what dictates everything.
Easy resins (amorphous — wide processing window):
• **ABS** — forgiving. Almost a default for consumer enclosures.
• **Polycarbonate (PC)** — clean install, no surprises. Stakes around 280 °C — if you push it to 320 it browns and strings, every time. (Story for another post — but the short of it: match temperature to the resin, not the last job's recipe.)
• **PC/ABS blends** — same as PC, marginally easier.
Trickier resins (semicrystalline — narrower window):
• **Nylon (PA66, PA6)** — works well, but moisture in the resin will steam off and foam the joint. Dry-as-moulded inserts go in clean; nylon left sitting for a week in humid air will look like a science experiment. Dry the parts.
• **Polypropylene (PP)** — works, but has a sharp melt transition. Energy-controlled presses are a huge advantage here over timer-based ones.
• **Acetal (POM)** — possible, narrow window, picky about temperature. Cross-section a sample before you commit a run.
Resins that fight you:
• **30%+ glass-filled anything** — the glass fibres don't melt, so they don't flow into the knurls. You'll get a fuzzy, slightly compromised joint that pulls out at a lower force than the same insert in unfilled resin. If you're stuck with glass-fill, oversize the insert or change the hole geometry to compensate.
• **PTFE / PEEK / thermosets** — either won't soften (thermosets), or need temperatures most thermal tips won't reach (PEEK), or won't bond to the knurls (PTFE). For thermosets you mould the insert in. For PEEK, talk to a specialist.
The four design rules that decide whether it holds
Skip these and the install will be cosmetic-only — looks fine, fails on a torque check. We see all four broken at least once a month on incoming prints.
1. Hole diameter — undersize it by exactly what the manufacturer says. This isn't a place to be clever. Too tight and the insert won't seat without splitting the boss. Too loose and the molten plastic can't flow into the knurls — the insert spins on first torque check. Follow the spec for the specific insert.
2. Boss wall thickness. Rule of thumb: outer boss wall thickness should be at least 0.5× the insert diameter. Thinner than that, the hoop stress as plastic cools cracks the boss. We've seen designs with a wall thickness of 0.6 mm trying to hold an M5 insert — they all cracked. All of them.
3. The insert should sit flush, or slightly proud — never recessed below the surface. If the insert ends up below the boss surface, the mating part bottoms out on plastic instead of metal, and clamp load goes into the plastic. That's a long, slow stripping job in service.
4. Fixturing matters as much as tooling. The part has to be rigidly supported directly under the insert during install. Any flex in the part and the energy goes into bending the part, not melting the boss interface. On our Benchtop Press the encoder confirms boss height to 0.1 mm before every cycle — but you still need a fixture that doesn't move.
If you want the full set of geometry rules, including stud dimensions and head styles, we've got a longer heat staking design guide on the resources page.
Heat staking vs ultrasonic threaded inserts — which to pick
Both processes install the same physical insert, the same way mechanically. The difference is the heat source.
| | Heat staking (thermal) | Ultrasonic | |---|---|---| | Heat source | Conduction through a heated tip | 20 kHz friction from a vibrating horn | | Best for | Most thermoplastics, multi-insert patterns, sensitive electronics | Single-insert assemblies, very high cycle-rate lines | | Cycle time | A few seconds per insert | Sub-second | | Sensitive components nearby | Fine — no vibration | Risky — vibration can crack solder joints or move components | | Equipment cost | Generally lower | Generally higher | | Tooling complexity | Multi-up easily — we stake up to 8 bosses simultaneously | One horn per geometry | | Glass-filled and high-temp resins | Handles them, slower | Can micro-crack |
The honest take: if you're a high-volume injection moulder dropping the same single insert into millions of identical phone cases, ultrasonic earns its money. For most assemblies — anything with multiple inserts in different locations on the same part, anything near a PCB, anything where you'd rather not commit to a horn-per-product — thermal is the right call. We've written a longer piece on when to choose heat staking vs ultrasonic welding for the broader joining question.
When NOT to heat stake an insert
This is the bit the vendor brochures leave out, so it's the bit I lead with.
If the joint will be torqued past the insert's pull-out rating, don't fight it — design for it. Heat staked inserts hold a lot, but they're not infinite. If the assembly torque spec is genuinely at the edge of what a brass insert can take, consider a longer insert, a flanged insert, or a moulded-in insert from the start.
If the part is thermoset. Phenolic, epoxy, BMC, melamine — they don't soften when you re-heat them. You'll burn the part before you get an install. Mould the insert in, or cold-press it.
If the boss wall is too thin and you can't change the mould. Better to use a self-tapping screw (PT, BT, or Plastite-style) than to crack every other boss. Honest answer.
If field service requires repeated removal of the insert itself. Inserts hold the screw through hundreds of cycles. But if the insert needs to come out (rare, but happens with rebuilds), heat staking doesn't undo cleanly. For that case, a moulded-in cage nut or a metal back-plate is the better long-term play.
We had a customer last year doing a medical enclosure where the housing was being staked closed for every service call — the boss was getting chewed up after two or three rounds of drilling and re-staking. We moved the serviceable points to brass threaded inserts: heat the tip, soften the plastic, press the knurled insert in, let it solidify. Now the unit takes a machine screw, comes apart and goes back together as many times as the field tech wants, and holds far more torque than a self-tapper biting into raw plastic ever would. Three minutes of design change, years of service life back.
FAQ: Heat staking inserts
What's the difference between a heat staked insert and a press-fit insert?
A press-fit (or cold-press) insert is forced into the hole with mechanical interference only — the plastic doesn't melt. It holds in hard, brittle plastics but creeps and loosens in softer ones. A heat staked insert melts and re-flows the plastic into the knurls, giving a tighter, more permanent lock with much higher pull-out strength. Press-fit is faster but lower performance; heat staked is the engineering answer for anything that matters.
How much torque can a heat staked insert hold?
Depends on the insert, the resin, and the boss design — but as a working rule of thumb, a properly installed M4 brass insert in ABS or PC will comfortably exceed the torque spec of an M4 machine screw before anything in the joint fails. The plastic boss is almost always the limiting factor, not the metal-to-plastic bond.
Can you remove a heat staked insert?
Not cleanly. You can drill it out or heat it and pull it, but you'll lose the boss in the process. Heat staking is a one-way join for the insert itself — the screw that goes into it, of course, comes in and out as many times as you like.
Do I need a special machine, or can I use a soldering iron?
For prototyping and one-offs, a temperature-controlled soldering iron with the right tip will absolutely install an insert. For production — anything with repeatability, validation, or volume — you want a real press with closed-loop control, a fixture, and depth control. Hand-installed inserts in a regulated industry will not pass an audit.
How long does it take to install one insert?
A few seconds per insert in a thermal press. Multi-up tooling stakes up to 8 inserts simultaneously on our Benchtop Press, so a part with eight inserts is still a few-second cycle.
Will the insert work in 30% glass-filled nylon?
Yes, but with caveats — see the resin section above. The fibres won't flow into the knurls, so pull-out is lower than in unfilled nylon. Oversize the insert, use a flanged style, or change the head/hole geometry to compensate.
Is this an RoHS-compliant process?
The process is. Whether the insert itself is depends on the alloy — most stainless and lead-free brass options on the market are RoHS-compliant. Confirm with the insert vendor before you spec.
Bringing it home
Heat staking inserts is one of those processes that looks like a vendor product feature and is actually a design-for-assembly decision. Get the boss geometry, the hole diameter, and the resin choice right, and the machine side is almost boring — heat, press, cool, done.
We design and build the brass insert installation systems and the tooling that goes with them, in Roanoke, Indiana, and we'll quote a free evaluation within 24 hours of you sending a part. If you're not sure whether your part is a stake candidate or a screw candidate, send it anyway — sometimes the honest answer saves you the press, and that's still a useful answer. Give us a call.
Get the insert spec, the boss, and the resin to agree on a single story, and your assembly will hold long after the warranty card has yellowed in the drawer.